


Uploading
Step 0: Install required software
The Arduino software can be used to program Nerdle. This is a popular “electronics prototyping platform based on flexible, easy-to-use hardware and software. It’s intended for artists, designers, hobbyists…”
There are installation guides for the Arduino software for Windows, Mac, and Linux. To get Nerdle ready to program on your computer, you only need to follow the section “Download the Arduino Environment”.
Start the Arduino software and close it. This sets up your “sketchbook” directory. On Windows, this folder is in your “My Documents”, and is named “Arduino”.
Step 1: Install Nerdle USB drivers
Programming the Nerdle uses a special USB interface, so we must first install a special piece of software called a driver, that helps your computer talk to the Nerdle. To do this, first download this ZIP file: usbasp-windriver.2009-02-28.zip. Extract the contents to your computer, but don’t forget where you extracted it!
Connect the Nerdle to a USB port, and press the reset button. You should see a window appear asking about the new hardware. It might look something like this:
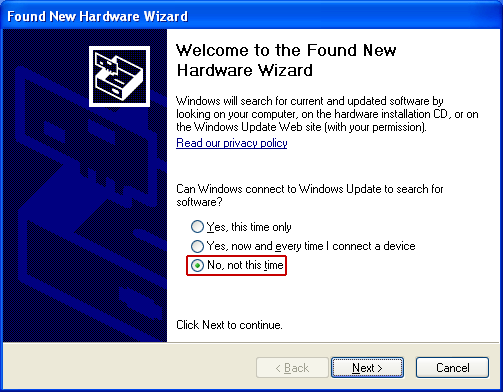
Select the option for “No, not this time” and click “Next”.
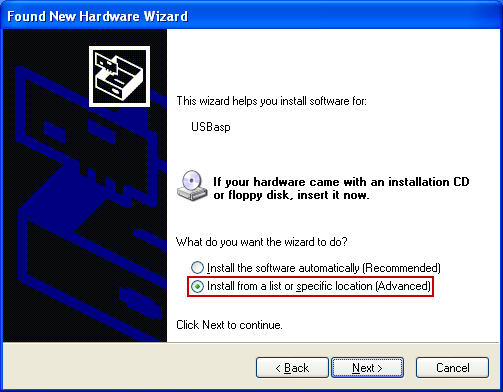
Select “Install from a list or specific location”, and click “Next”.
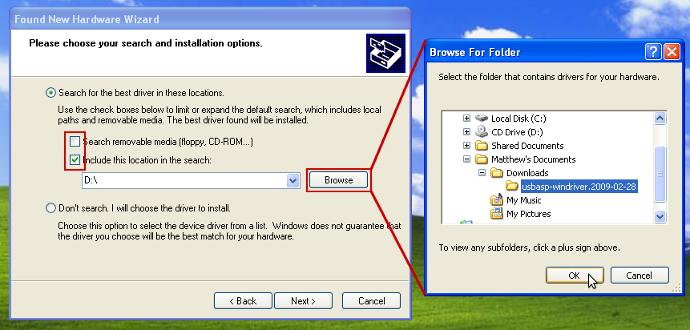
Next, uncheck the first box, and check the second one. Click the browse button and select the “usbasp” folder you extracted before. Press “Next”, and the installer should continue installing the drivers. When it’s done, click “Finish” and your Nerdle drivers should be ready to go!
Step 2: Install Nerdle libraries
To get Nerdle working with the Arduino software, download and open the following zip file: Nerdle for Arduino
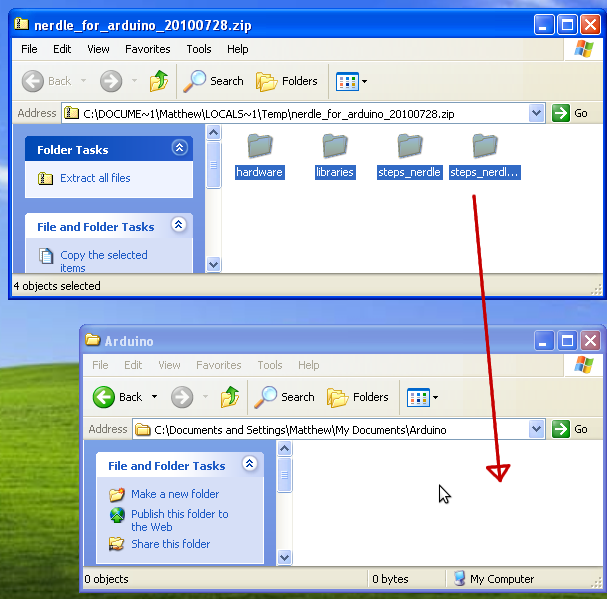
Put the contents of the zip file in your sketchbook directory. It’s probably easiest to open the .zip file, select the four folders inside, and drag them into the “Arduino” folder in your “My Documents”, as show in the image below.
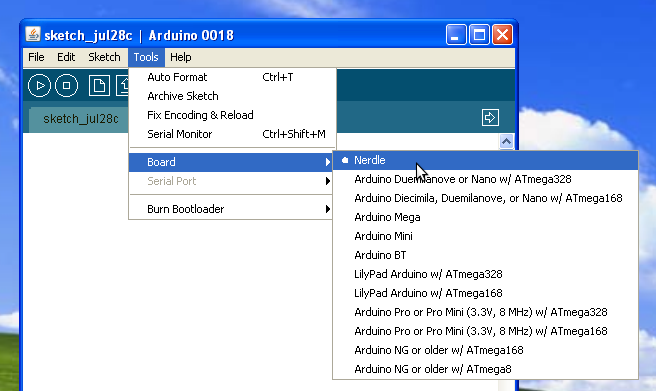
Now, start the Arduino software. In the Tools > Board menu, there should be an option titled “Nerdle”. Select it, and the Arduino environment will be set up for your Nerdle.
Step 3: Upload Nerdle firmware
Firmware is the name for software that runs on a device like the Nerdle. With the Arduino software, firmware is also sometimes called a “sketch”.
To upload sketches to your Nerdle, connect the Nerdle to the PC using the mini-B USB cable. Then, press the reset button on the Nerdle. The screen should go blank, and the device is now in “bootloader mode.”
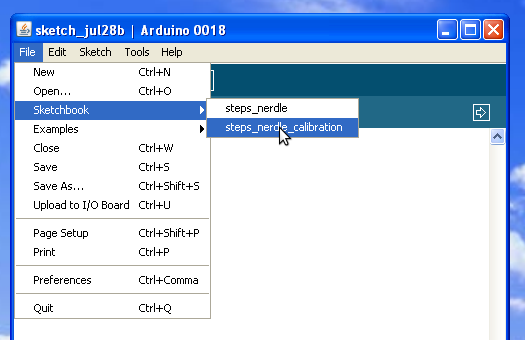
The first sketch you should try is the “steps nerdle calibration” sketch. You can load up previously-made sketches from the “File” menu, by selecting “Sketchbook”, and then “steps_nerdle_calibration”. This sketch will help you test out the Nerdle buttons.
Upload a sketch using the keyboard shortcut Ctrl-U or using the upload button in the top bar. The sketch will run on the device after it is uploaded. To upload again, keep the device plugged into USB and press reset again.
If you enter bootloader mode and don’t want to upload anything, unplug it from USB, and press reset. The stored program will run.
Two sketches are currently included. Steps_nerdle is the main sketch, and is a word party game or flashcard device. Steps_nerdle_calibration helps calibrate your buttons if you are having trouble.