


Bluetooth Arcade Controller released!
If you’ve been following Wayne and Layne for a while, you’ve surely noticed that we’ve been kicking around this idea of a bluetooth-connected arcade controller, we even identified a bluetooth module and made a breakout board for it. Fortunately, our friend Jeff at the Keyglove project showed us a much nice and much more flexible bluetooth module, that works much better than our original module.
In conjunction with another friend of ours, John Baichtal, we turned our penchant for bluetooth keyboards into a how-to article in Make Magazine volume 28, along with producing an actual product! We’re proud to announce the release of the Bluetooth Arcade Controller, and add-on shield for the Arduino Mega, that lets you turn some arcade joysticks and buttons into a bluetooth keyboard.

We built a small demonstration unit with one joystick and six buttons for the 2011 World Maker Faire in New York City back in September. We connected it to a tablet computer and used the bluetooth keyboard to play games.

The Bluetooth Arcade Controller can support over 52 buttons, joysticks, switches, etc. A system-level diagram on how to hook things up is shown below. More details are available from the Bluetooth Arcade Controller page.
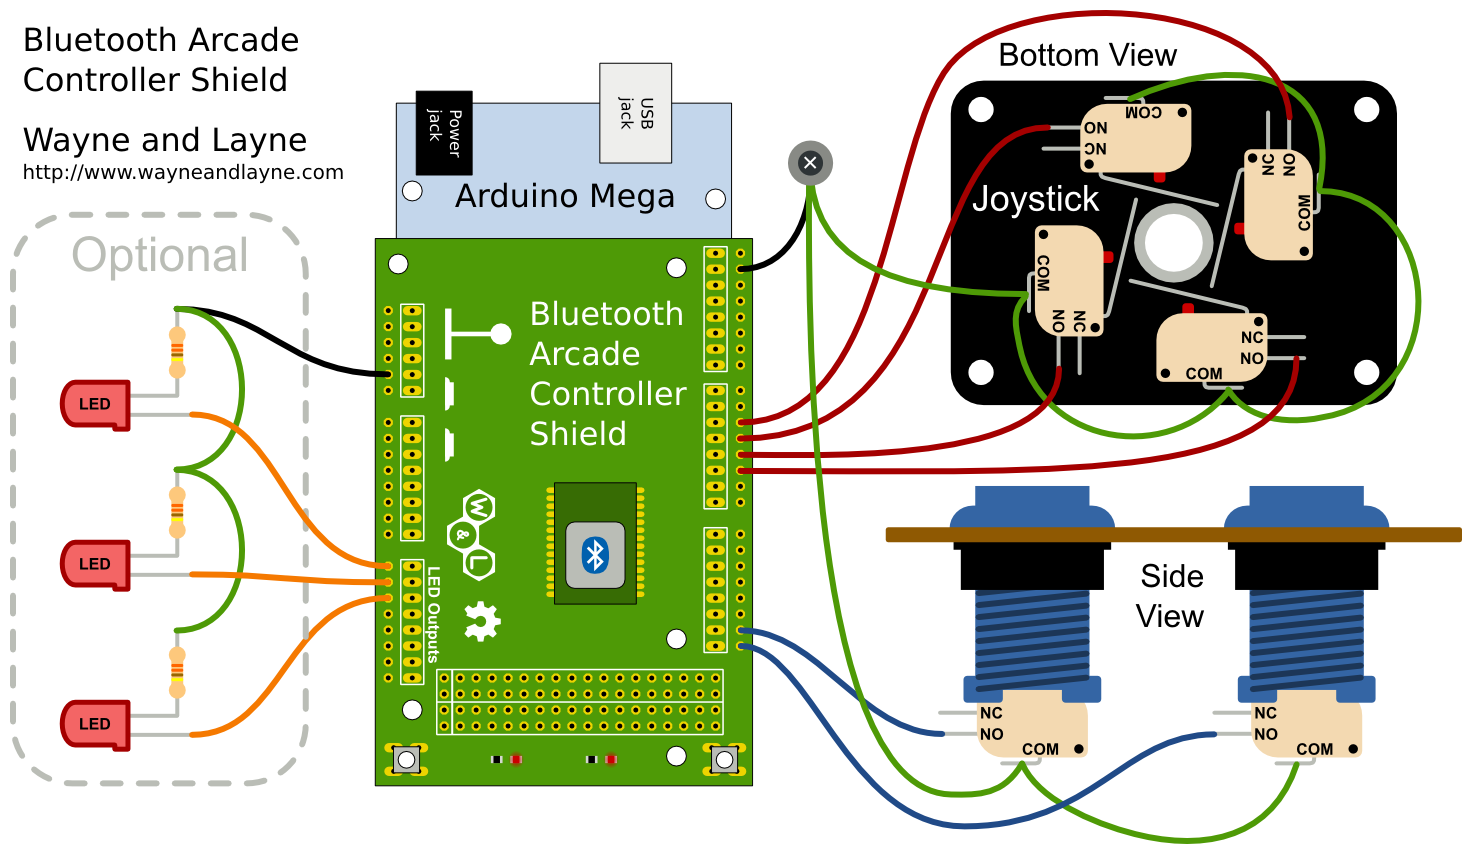
The Bluetooth Arcade Controller is available for purchase exclusively through the Maker Shed Store.
From the mail bag: Blinky Grid
We got this lovely email a few days ago.
Hello,
I bought one of your blinky grid kits at Maker Faire a few weeks ago
and just built it yesterday. Just wanted to let you know I had a blast
doing it. I was kinda scared because I’d never done any soldering but,
after a few minutes I picked it up and was able to finish the kit in
about two hours.Thanks for the good time,
Sonny
Awesome! That’s what we’re hearing from folks. The Blinky Grid looks pretty daunting, but for folks who haven’t soldered before, it usually takes them about two hours to complete the Blinky Grid kit.
Blinky Grid and Blinky POV
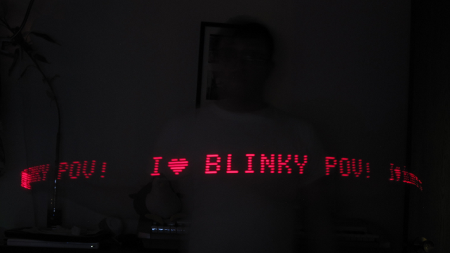
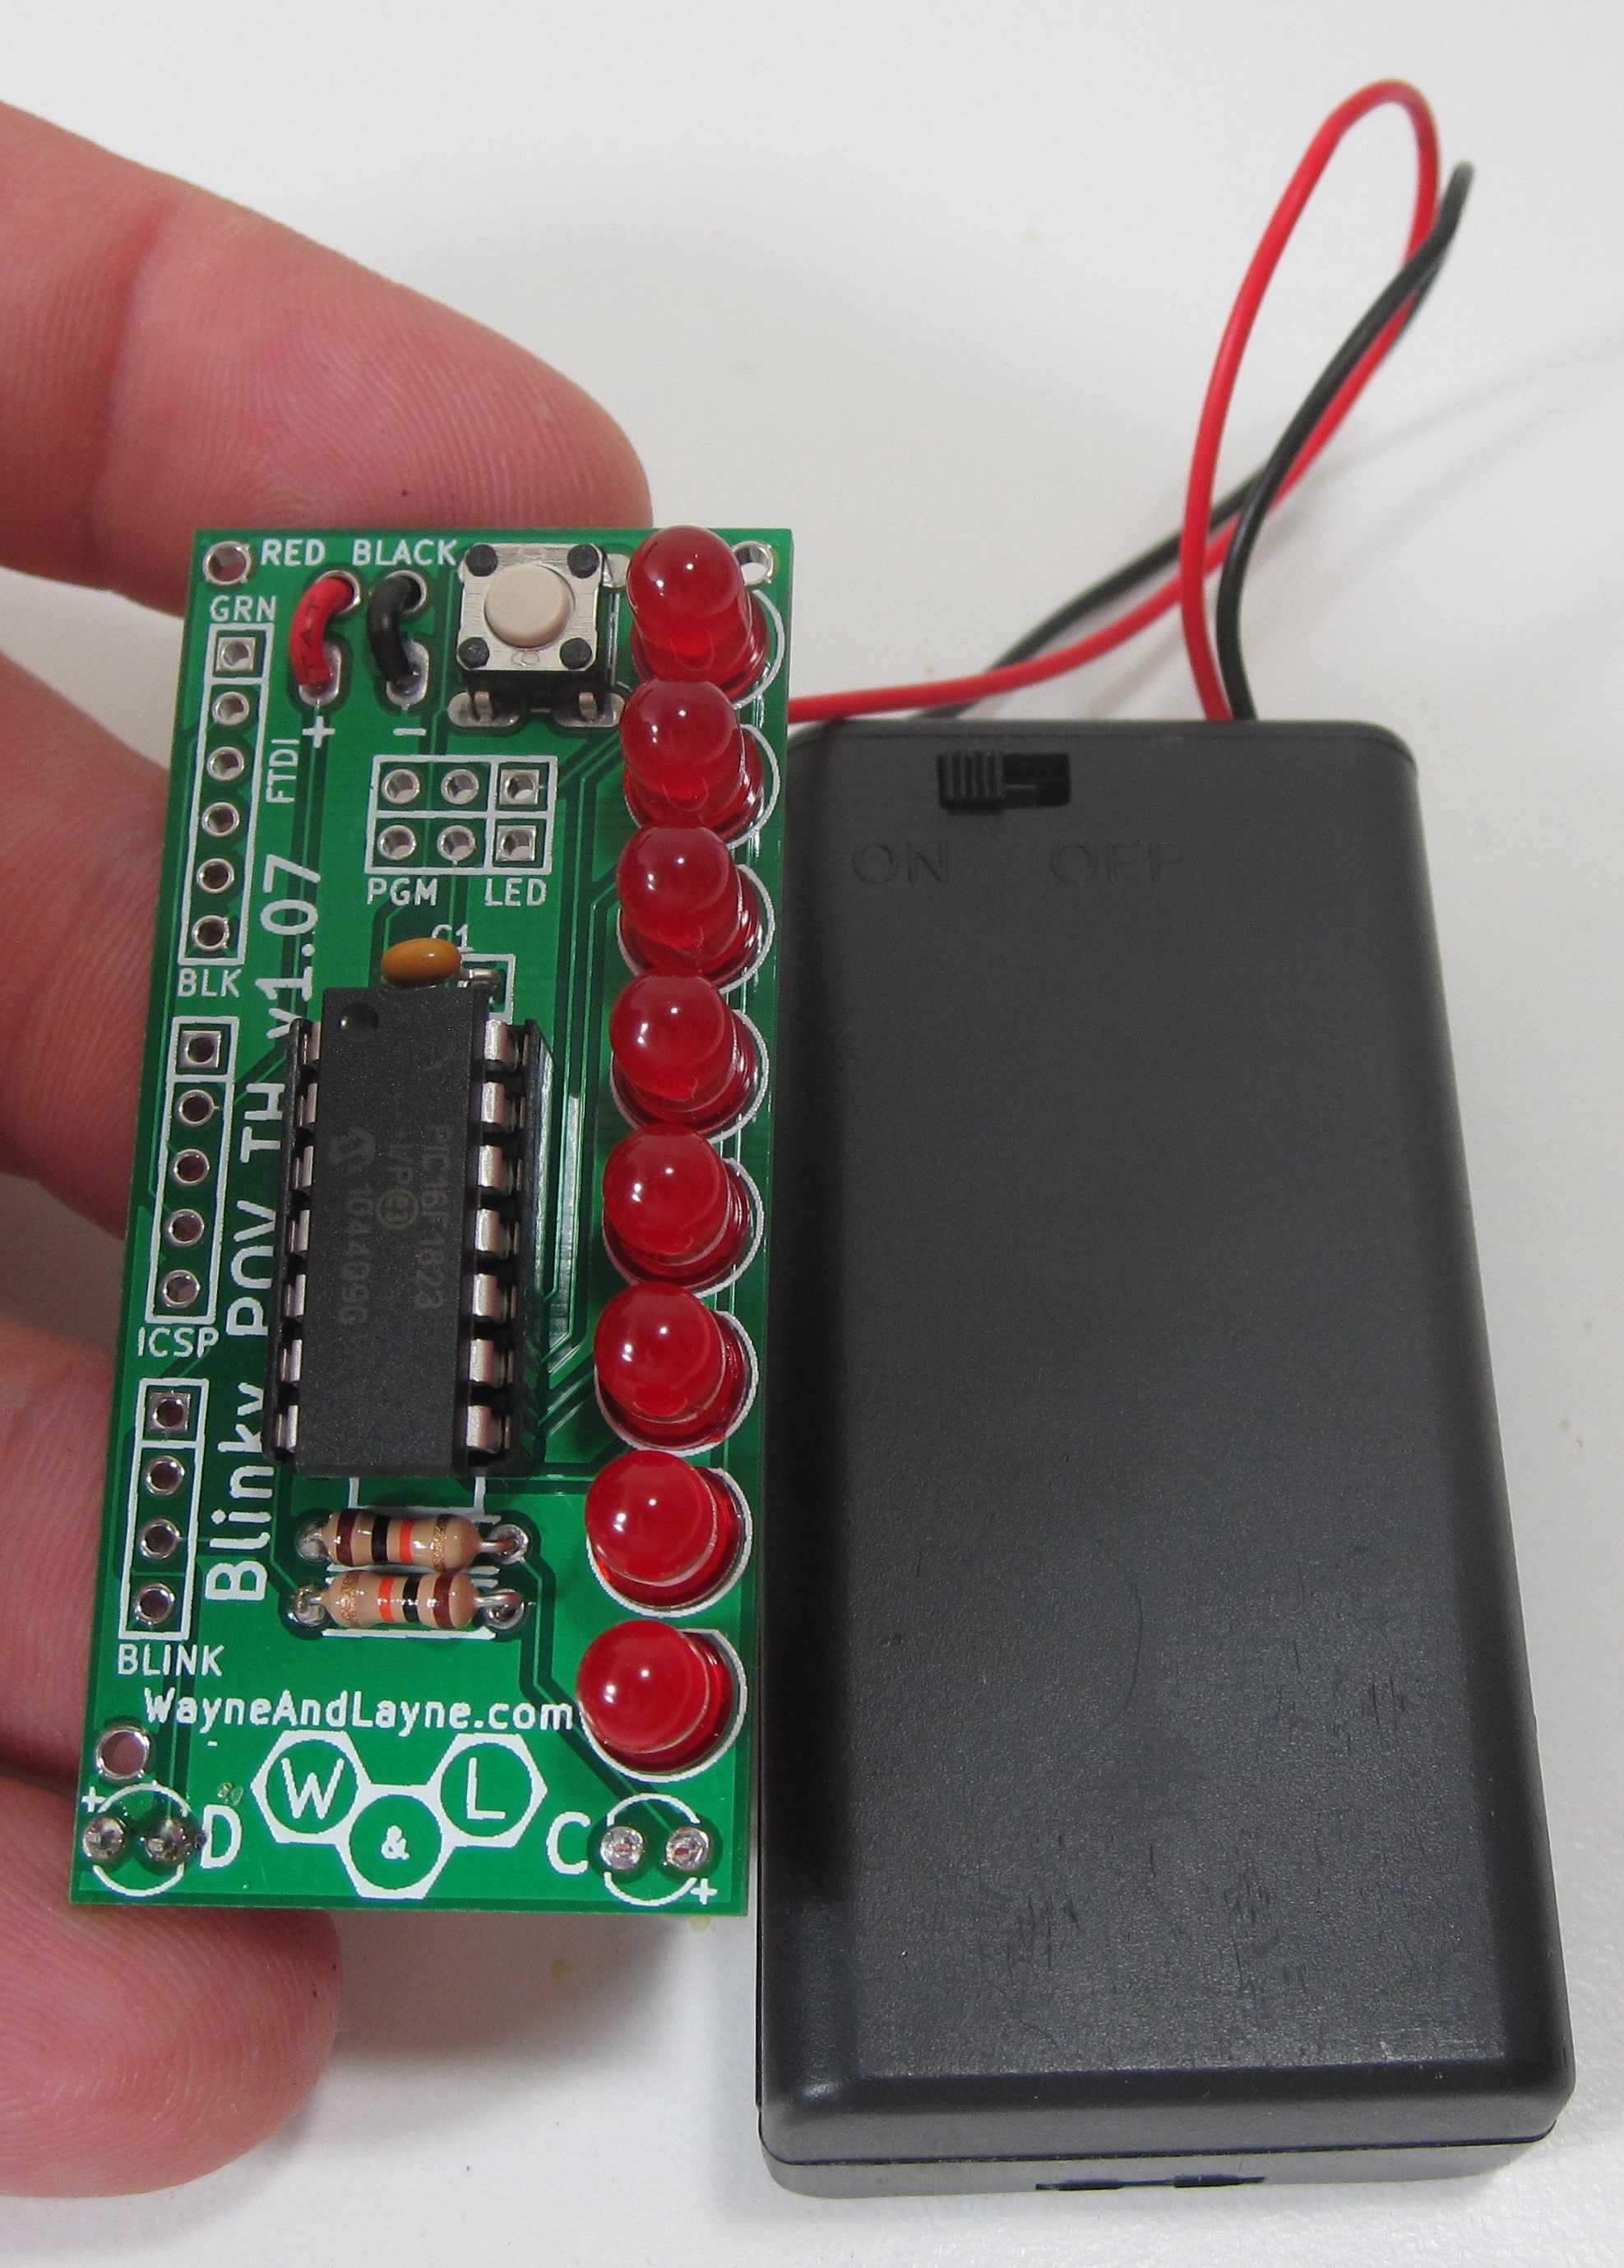
We’ve released two new kits, Blinky Grid and Blinky POV. Both are little LED kits that are reprogrammed by holding them up to our web page that blinks. Those blinks are picked up by light sensors on the board, reprogramming the chip. Blinky POV is 8 LEDs and is meant to be swung through the air, like this:
It looks like this when assembled:
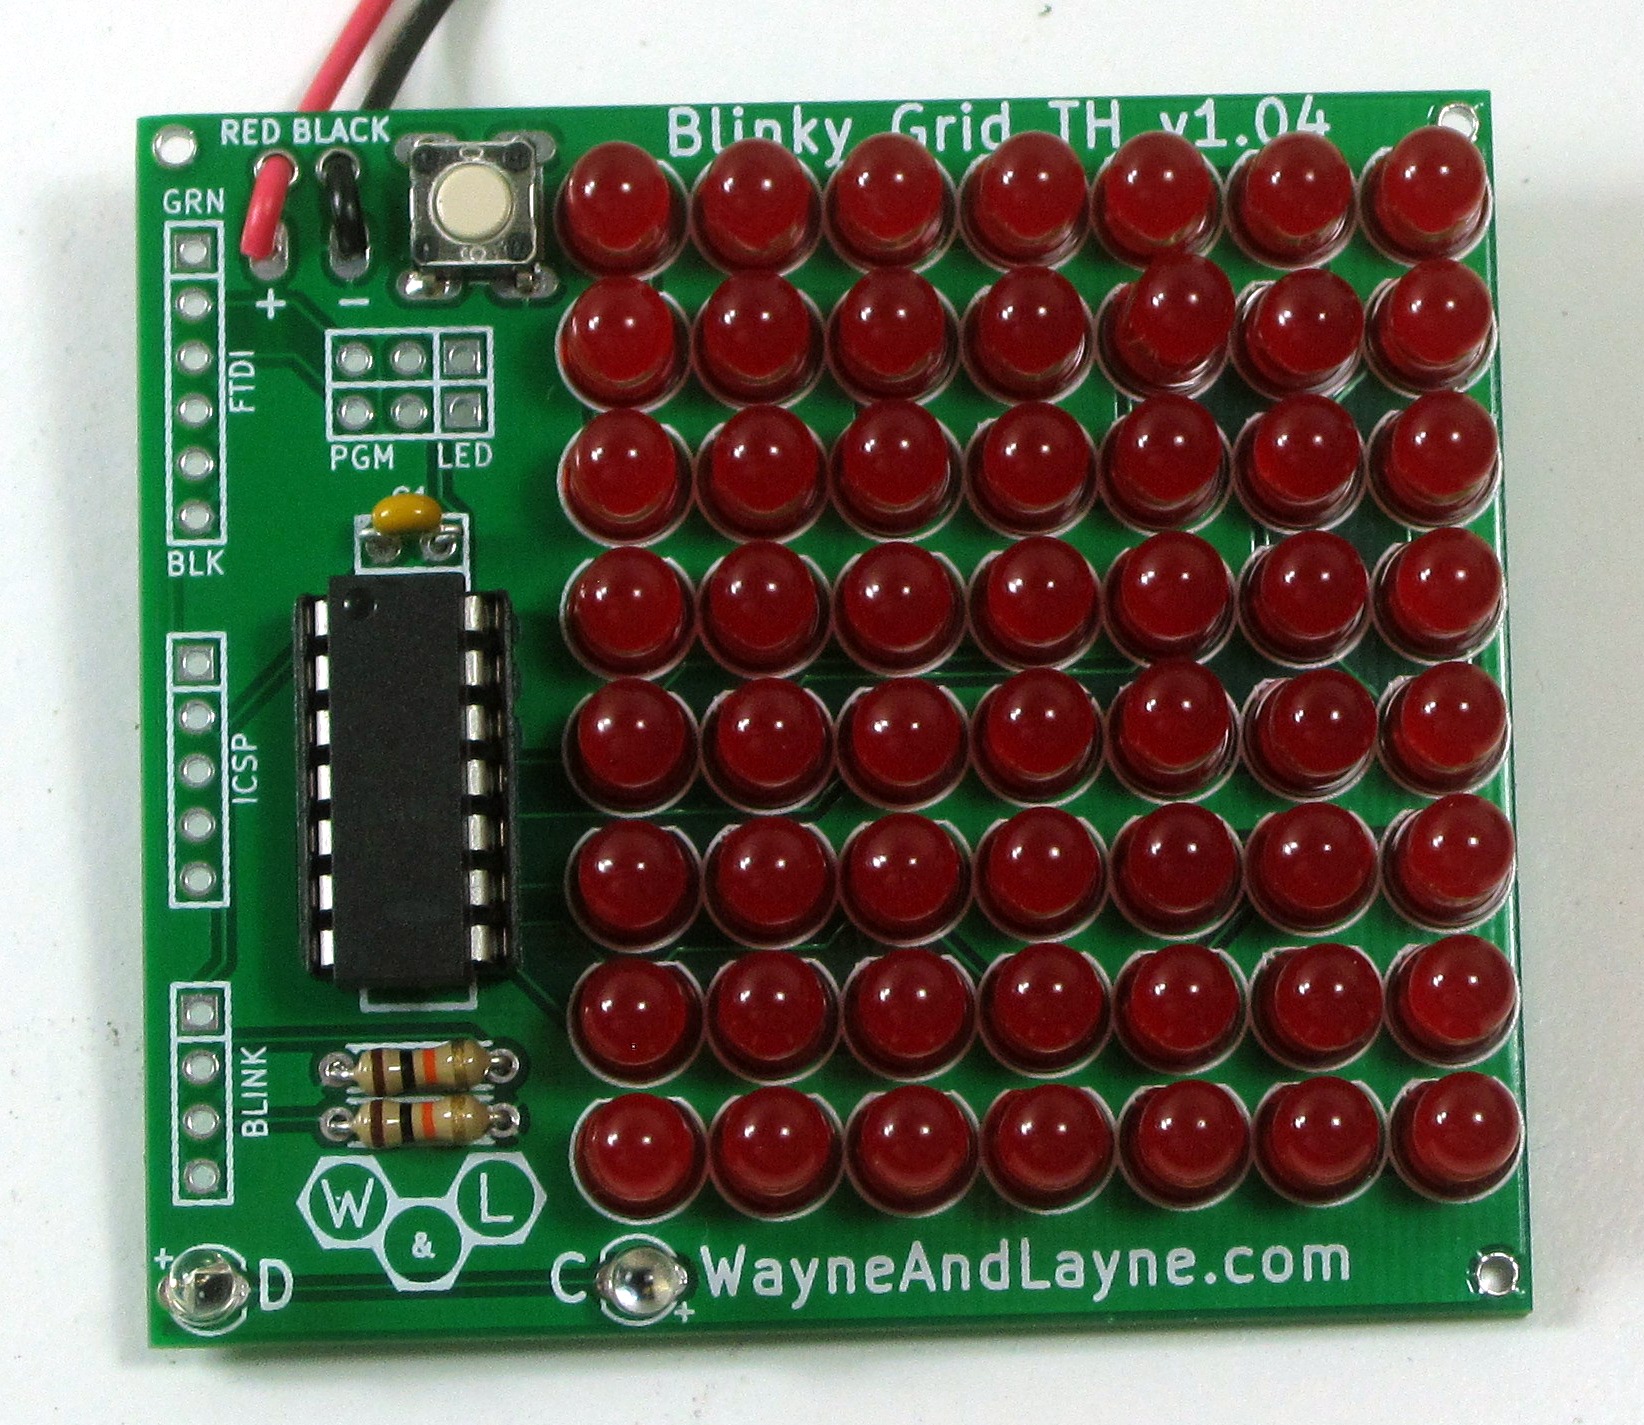
Blinky Grid has 56 LEDs, and is totally awesome. It looks like this when assembled:
Here’s a nifty demo video of Blinky Grid, showing the programming features near the end:
These kits were developed in a bit of a new way for us. We did an online form to apply for the beta test, and we learned a lot in that process. Beta test applicants, we will be sending you one-and-only-one email to you this week with a coupon code for these kits as a way to say thanks. After the beta test, they were soft-launched at the 2011 Bay Area Maker Faire. Hopefully, getting more feedback throughout the development process helped make a better kit.
They’re available now in our store and in the Maker Shed: Blinky Grid and Blinky POV.
Come see us at Maker Faire!
I’ll be in San Mateo this weekend, at Maker Faire. I’ll be manning the Wayne and Layne booth in the Maker Shed building. Come say hi, or take a look at our new Blinky kits!
When you use the online USPS shipping label generator (we use it via paypal), it generates a full page of information. The top half of the page is the label you affix to the package, and the other half is full of extra info that isn’t needed for the shipping label. If you want to use full-page label sheets, you really don’t want to waste half the page each time you print a label. To work around this, we developed a script to split a PDF into top- and bottom-half PDFs, enabling you to only print the top half (the actual label) while leaving the bottom half of the label page usable for the next label you print.
For example, here’s a slightly-doctored image of the original printing label. I have highlighted the actual label, and darkened out everything else:

The script below is used to split that PDF document into two smaller documents, one each for the upper and lower half. We have only tested it on Linux, but it might work on windows or Mac OS if you have the right tools installed (ghostscript).
#!/bin/bash
# A script used to split USPS shipping labels into two pages,
# so you can print the label without wasting the other half.
# Written by Matthew Beckler, for Wayne and Layne, LLC
# wayneandlayne at wayneandlayne dot com
# Last Updated: January 23, 2011
#
# This is what GS told me the original PDF size was
# Page 1 MediaBox: [ 612 792 ]
# Output produced from this command:
# gs -dNODISPLAY -q -sFile=input.pdf -dDumpMediaSizes \
# -dDumpFontsUsed -dShowEmbeddedFonts pdf_info.ps
# which uses the file "pdf_info.ps" from the GS source code.

BASENAME=`basename "$1" .pdf`

gs -o "${BASENAME}_label.pdf" -sDEVICE=pdfwrite -g6120x3960 -c \
"<</PageOffset [0 -399]>> setpagedevice" -f "$1"

gs -o "${BASENAME}_info.pdf" -sDEVICE=pdfwrite -g6120x3960 -c \
"<</pageOffset [0 0]>> setpagedevice" -f "$1"
You can easily use this script to split a PDF into two halves by passing in the name of the PDF document as the first and only argument:
./split_usps_shipping_label.sh shipping.pdf
The script will create two files: shipping_label.pdf and shipping_info.pdf (it’s based on the name of the file you specified).shipping_label.pdf will be a half page containing only the upper-half of the original document, and can be directly printed without wasting the other half of the full-page label.
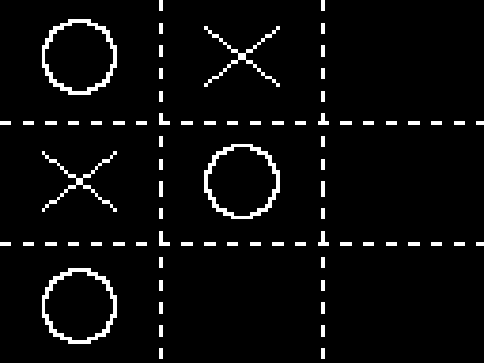
Many thanks to Wayne and Layne forum member Pascal König for sharing his tic-tac-toe game for the Video Game Shield! It features two player support, nice graphics, solid gameplay, and easily understood code. A screenshot is shown below, and the new code is available, as always, on the Video Game Shield download page, as well as in our github repository.
Open Source Hardware Logo in Kicad

Today, the open source hardware logo was chosen via poll.
Wayne and Layne uses and loves Kicad, an open source ECAD program for laying out our PCBs. A while ago, we wrote an open source web and standalone app called img2mod that can convert images to Kicad modules, suitable for putting on silkscreen layers (or copper or anything else).
This afternoon, I took a few minutes and put a few different sizes of this logo into a library that anyone can include in their Kicad project and brand their PCB as open source hardware.
So, if you’d like to make your PCBs with an open source PCB layout tool, we heartily recommend Kicad (although we hear geda is pretty good too).
The logo library is up on our github, in a new Open-Source-Hardware-Logos-for-Kicad repository.
Note: we haven’t tried these yet (it’s only been official since this morning!), but we’ll continue to refine them as we try them on real boards.
BP20422 Breakout Board
We were recently contacted by Jeff Rowberg, who’s working on the very cool Keyglove project, about our previous work with the BP20422 bluetooth module breakout board. He was looking for a breakout board similar to what we were doing, but was interested in a breadboard-compatible version. Wayne and Layne quickly whipped up a new breadboard-compatible version of the breakout board. Jeff wrote up a great blog post about the new breakout board, and his experiences with slightly-different modules.

We’ve received a few messages asking if we’re selling the breakout boards, or if the design files are available anywhere. We’ve decided to release the design as open source hardware, much like our other kits. While we aren’t selling them as kits right now (we may in the future) here is a ZIP archive of the Kicad design files for the schematic and PCB:
If you’re interested in getting this PCB fabricated, we highly recommend the most-excellent PCB service offered by @laen.
Here’s the Bill of Materials (BOM) for the circuit board, with links to the mouser part we’ve used in the past (only for non-standard parts):
| Quantity | Description | PCB label | ||
| 1 | 330 ohm resistor | R1 | ||
| 1 | 2.2 uF capacitor | C1 | ||
| 2 | 10k ohm resistor | R2, R3 | ||
| 2 | 0.1 uF ceramic capacitor | C2, C3 | ||
| 2 | 68 uF electrolytic capacitor | C4, C5 | ||
| 1 | BP20422 module | U1 | ||
| 1 | Blue LED | D1 | ||
| 1 | 6 mm pushbutton switch | SW1 | ||
| 48 | Standard 0.1″ header pins | P1-P6 |
Update: Thanks to Jeff for leaving a comment with a link to a better capacitor that will fit better on the PCB. Thanks, Jeff!
Early adopters of the new Arduino UNO and Arduino Mega 2560 using the Linux operating system seemed to have a number of bizarre issues with the serial port connectivity. Fortunately, the Arduino team just released a new firmware patch for the little ATmega8U2 microcontroller that handles the serial communications. They wrote up some great photos and instructions on how to re-flash your Arduino UNO. but they don’t have any information or photos for the Mega 2560.
Well, tonight I looked at the Mega 2560 schematic and PCB layout files in Eagle, and figured out what I needed to do to properly reset the 8U2 serial port chip to enable the “DFU” programming mode. The general idea is to reset the chip while shorting two pads on the backside of the circuit board. The two pads you need to short are in a different location on the Mega than the UNO, and are highlighted in the image below in green. The other two pads you need to short are highlighted in red.

You’re going to want to follow the guide posted for installing the Linux/OSX/Windows DFU programming software, and the rest of the re-programming process. This page shows the procedure for resetting your Arduino Mega 2560 into DFU programming mode. This procedure is as follows:
- Plug your Mega into the computer as normal, using the USB cable.
- Using a piece of wire or a screwdriver tip, short out the pads above circled in green. Keep them shorted out until the end.
- Using another piece of wire or another screwdriver, short out the pads above in red.
- Stop shorting out the red pins.
- Stop shorting out the green pins.
Now, if you check in your Arduino menu, the board’s serial port should no longer show up in the menu. You can now follow the rest of the guide on re-flashing your 8U2 serial port firmware with the latest version.
The Open Source Hardware Definition hit 1.0 this morning. Awesome! We’ve been behind Open Source Hardware since we started–all our kits are open source hardware. We sponsored the Open Source Hardware Summit in September, and we’re really believers in it.
Piggybacking on the news, however, I’d like to start a discussion.
In September, we launched our Video Game Shield kit. It’s an Arduino shield that allows you to use two Wii peripherals and draw in black and white on a television screen. It uses the open source TVOut library. A little bit later, nootropic designs released their Hackvision. The Hackvision is a handheld board that combines the guts of an Arduino with some RCA jacks. It uses the Arduino IDE for programming along with the TVOut library. It has some buttons built in and an expansion port for wiring in your own controllers.
So, because his system uses Arduino and TVOut libraries, it’s relatively easy to get his games to run on a Video Game Shield. You need to change some pin definitions, and maybe make a few more changes, but they’re extremely minor.
Due to the fact that most Video Game Shield games use both Wii connectors, it isn’t quite as easy to get our games to run on a Hackvision, but for single player Video Game Shield games, it’s just as easy to convert our games to run on the Hackvision.
We’ve talked with the Hackvision folks about putting their games on our site, but this situation raises a lot of questions.
All the Video Game Shield and Hackvision “official” games are open source, and we’re pretty sure we’d be legally ok modifying the Hackvision games and posting them on our website. We *haven’t*, and we don’t really have any plans to, but would it be alright if we did? Should we? If someone else did, should we link to them?
If the blog comments get to be overwhelming, we can move this over to the Wayne and Layne forum.