


Kicad converter for TM-240A Pick-and-Place machines
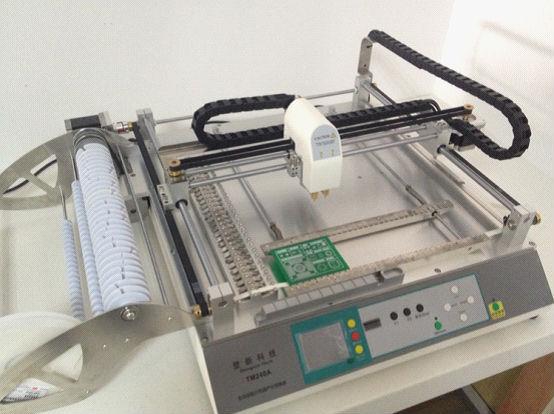
In the summer of 2014, Wayne and Layne purchased a Pick-and-Place machine, specifically the Neoden TM-240A. After doing a few small prototype production runs, we decided to create a presentation at the 2014 World Maker Faire in NYC, to share the tips and tricks we’ve learned about working with this PnP machine, as well as an honest analysis of its capabilities, strengths, and limitations. You can also download our slides (PDF). The PDF slides don’t include the embedded video, but that video has been posted to YouTube.
The Pick-and-Place machine needs to know where to place each part, and we have created some software to help convert the PCB design data from our favorite ECAD tool, KiCad, into the proper file format needed for these PnP machines. The documentation for this software is below. We hope that it’s useful for your needs.
tm2x0
tm2x0 is a Python package for working with Neoden TM220A and TM240A pick and place machines.
It currently has a script for generating a .CSV input file for the PnP from a KiCad .pos file, using an interactive command-line menu.
It was developed by Adam Wolf and Matthew Beckler of Wayne and Layne, LLC, with no affiliation with Neoden other than we own one of their machines.
Installation
tm2x0 is a Python module. You should be able to install it through pip or however you normally install Python modules.
Let us know if you have problems.
Mac OS X / Linux
If you already have special Python stuff set up, use that–otherwise, you can try
easy_install http://www.wayneandlayne.com/files/tm2x0-0.1.zip
Windows
We haven’t tested this tool on Windows at all, but it should work. Try easy_install or pip.
Usage
Generate a .pos file from pcbnew, through the File->Generate Fabrication Output menu.
Run tm2x0-kicad-convert with those .pos files.
tm2x0-kicad-convert --kicad-file myfile.pos
The general workflow is to assign parts to reels by number, and then configure each reel.
After that, you export the output for the machine. If you have reels configured in a CSV
file already, you can feed that into the program so it will reuse those configurations,
but you still have to assign each part to a reel. You can pull in general settings
for some package types through the autoset menu.
If you don’t specify an output file, or if there’s issues writing to the file, the
converter will output the machine CSV instructions to the console.
Example Usage
PNP CSV Manipulation: Unassigned Parts:(R1) (R2) (R3) (D1) Choose an option: 1) Assign Parts to Reels 2) Save to file ? 1 Assigning Parts to Reels: Unassigned Parts: 1) (R1) 2) (R2) 3) (R3) 4) (D1) 5) Back Which part would you like to assign to a reel? 1 Which reel would you like to assign part to? (0 is tray, 1 is closest to front, ...) 1 Reels with Parts: Reel 1 (R1) Unassigned Parts: 1) (R2) 2) (R3) 3) (D1) 4) Back Which part would you like to assign to a reel? 1 Which reel would you like to assign part to? (0 is tray, 1 is closest to front, ...) 2 Reels with Parts: Reel 1 (R1) Reel 2 (R2) Unassigned Parts: 1) (R3) 2) (D1) 3) Back Which part would you like to assign to a reel? 1 Which reel would you like to assign part to? (0 is tray, 1 is closest to front, ...) 5 Reels with Parts: Reel 1 (R1) Reel 2 (R2) Reel 5 (R3) Unassigned Parts: 1) (D1) 2) Back Which part would you like to assign to a reel? 1 Which reel would you like to assign part to? (0 is tray, 1 is closest to front, ...) 3 All parts have been assigned to reels. PNP CSV Manipulation: Reels: Reel 1 Reel 2 Reel 3 Reel 5 Choose an option: 1) Configure Reels 2) Save to file ? 1 Reel 1 is configured as follows: Feed Spacing (mm): None Part X Offset (mm): None Part Y Offset (mm): None Part Height (mm): 0 Extra Rotation (degrees, positive is counter-clockwise): 0 Comment: None Parts: R1 Reel 2 is configured as follows: Feed Spacing (mm): None Part X Offset (mm): None Part Y Offset (mm): None Part Height (mm): 0 Extra Rotation (degrees, positive is counter-clockwise): 0 Comment: None Parts: R2 Reel 3 is configured as follows: Feed Spacing (mm): None Part X Offset (mm): None Part Y Offset (mm): None Part Height (mm): 0 Extra Rotation (degrees, positive is counter-clockwise): 0 Comment: None Parts: D1 Reel 5 is configured as follows: Feed Spacing (mm): None Part X Offset (mm): None Part Y Offset (mm): None Part Height (mm): 0 Extra Rotation (degrees, positive is counter-clockwise): 0 Comment: None Parts: R3 Which reel would you like to configure? [1, 2, 3, 5, (f)inished] 1 Reel 1 is configured as follows: Feed Spacing (mm): None Part X Offset (mm): None Part Y Offset (mm): None Part Height (mm): 0 Extra Rotation (degrees, positive is counter-clockwise): 0 Comment: None Parts: R1 Configure Reel 1) Autoset parameters 2) Feed Spacing 3) Part X Offset 4) Part Y Offset 5) Height 6) Rotation 7) Comment 8) Unassign a Part 9) Back Which parameter would you like to set? 1 Autoset Parameters 1) 0402 2) 0603 3) 0805 4) 1206 5) Back Which configuration would you like to copy? 4 Reel 1 is configured as follows: Feed Spacing (mm): 4.0 Part X Offset (mm): 0.23 Part Y Offset (mm): 0 Part Height (mm): 0 Extra Rotation (degrees, positive is counter-clockwise): 0 Comment: 1206 Parts: R1 Configure Reel 1) Autoset parameters 2) Feed Spacing 3) Part X Offset 4) Part Y Offset 5) Height 6) Rotation 7) Comment 8) Unassign a Part 9) Back Which parameter would you like to set? 9 Reel 1 is configured as follows: Feed Spacing (mm): 4.0 Part X Offset (mm): 0.23 Part Y Offset (mm): 0 Part Height (mm): 0 Extra Rotation (degrees, positive is counter-clockwise): 0 Comment: 1206 Parts: R1 Reel 2 is configured as follows: Feed Spacing (mm): None Part X Offset (mm): None Part Y Offset (mm): None Part Height (mm): 0 Extra Rotation (degrees, positive is counter-clockwise): 0 Comment: None Parts: R2 Reel 3 is configured as follows: Feed Spacing (mm): None Part X Offset (mm): None Part Y Offset (mm): None Part Height (mm): 0 Extra Rotation (degrees, positive is counter-clockwise): 0 Comment: None Parts: D1 Reel 5 is configured as follows: Feed Spacing (mm): None Part X Offset (mm): None Part Y Offset (mm): None Part Height (mm): 0 Extra Rotation (degrees, positive is counter-clockwise): 0 Comment: None Parts: R3 Which reel would you like to configure? [1, 2, 3, 5, (f)inished] 2 Reel 2 is configured as follows: Feed Spacing (mm): None Part X Offset (mm): None Part Y Offset (mm): None Part Height (mm): 0 Extra Rotation (degrees, positive is counter-clockwise): 0 Comment: None Parts: R2 Configure Reel 1) Autoset parameters 2) Feed Spacing 3) Part X Offset 4) Part Y Offset 5) Height 6) Rotation 7) Comment 8) Unassign a Part 9) Back Which parameter would you like to set? 1 Autoset Parameters 1) 0402 2) 0603 3) 0805 4) 1206 5) Back Which configuration would you like to copy? 3 Reel 2 is configured as follows: Feed Spacing (mm): 4.0 Part X Offset (mm): 0.05 Part Y Offset (mm): 0 Part Height (mm): 0 Extra Rotation (degrees, positive is counter-clockwise): 0 Comment: 0805 Parts: R2 Configure Reel 1) Autoset parameters 2) Feed Spacing 3) Part X Offset 4) Part Y Offset 5) Height 6) Rotation 7) Comment 8) Unassign a Part 9) Back Which parameter would you like to set? 9 Reel 1 is configured as follows: Feed Spacing (mm): 4.0 Part X Offset (mm): 0.23 Part Y Offset (mm): 0 Part Height (mm): 0 Extra Rotation (degrees, positive is counter-clockwise): 0 Comment: 1206 Parts: R1 Reel 2 is configured as follows: Feed Spacing (mm): 4.0 Part X Offset (mm): 0.05 Part Y Offset (mm): 0 Part Height (mm): 0 Extra Rotation (degrees, positive is counter-clockwise): 0 Comment: 0805 Parts: R2 Reel 3 is configured as follows: Feed Spacing (mm): None Part X Offset (mm): None Part Y Offset (mm): None Part Height (mm): 0 Extra Rotation (degrees, positive is counter-clockwise): 0 Comment: None Parts: D1 Reel 5 is configured as follows: Feed Spacing (mm): None Part X Offset (mm): None Part Y Offset (mm): None Part Height (mm): 0 Extra Rotation (degrees, positive is counter-clockwise): 0 Comment: None Parts: R3 Which reel would you like to configure? [1, 2, 3, 5, (f)inished] 3 Reel 3 is configured as follows: Feed Spacing (mm): None Part X Offset (mm): None Part Y Offset (mm): None Part Height (mm): 0 Extra Rotation (degrees, positive is counter-clockwise): 0 Comment: None Parts: D1 Configure Reel 1) Autoset parameters 2) Feed Spacing 3) Part X Offset 4) Part Y Offset 5) Height 6) Rotation 7) Comment 8) Unassign a Part 9) Back Which parameter would you like to set? 1 Autoset Parameters 1) 0402 2) 0603 3) 0805 4) 1206 5) Back Which configuration would you like to copy? 4 Reel 3 is configured as follows: Feed Spacing (mm): 4.0 Part X Offset (mm): 0.23 Part Y Offset (mm): 0 Part Height (mm): 0 Extra Rotation (degrees, positive is counter-clockwise): 0 Comment: 1206 Parts: D1 Configure Reel 1) Autoset parameters 2) Feed Spacing 3) Part X Offset 4) Part Y Offset 5) Height 6) Rotation 7) Comment 8) Unassign a Part 9) Back Which parameter would you like to set? 9 Reel 1 is configured as follows: Feed Spacing (mm): 4.0 Part X Offset (mm): 0.23 Part Y Offset (mm): 0 Part Height (mm): 0 Extra Rotation (degrees, positive is counter-clockwise): 0 Comment: 1206 Parts: R1 Reel 2 is configured as follows: Feed Spacing (mm): 4.0 Part X Offset (mm): 0.05 Part Y Offset (mm): 0 Part Height (mm): 0 Extra Rotation (degrees, positive is counter-clockwise): 0 Comment: 0805 Parts: R2 Reel 3 is configured as follows: Feed Spacing (mm): 4.0 Part X Offset (mm): 0.23 Part Y Offset (mm): 0 Part Height (mm): 0 Extra Rotation (degrees, positive is counter-clockwise): 0 Comment: 1206 Parts: D1 Reel 5 is configured as follows: Feed Spacing (mm): None Part X Offset (mm): None Part Y Offset (mm): None Part Height (mm): 0 Extra Rotation (degrees, positive is counter-clockwise): 0 Comment: None Parts: R3 Which reel would you like to configure? [1, 2, 3, 5, (f)inished] 5 Reel 5 is configured as follows: Feed Spacing (mm): None Part X Offset (mm): None Part Y Offset (mm): None Part Height (mm): 0 Extra Rotation (degrees, positive is counter-clockwise): 0 Comment: None Parts: R3 Configure Reel 1) Autoset parameters 2) Feed Spacing 3) Part X Offset 4) Part Y Offset 5) Height 6) Rotation 7) Comment 8) Unassign a Part 9) Back Which parameter would you like to set? 1 Autoset Parameters 1) 0402 2) 0603 3) 0805 4) 1206 5) Back Which configuration would you like to copy? 4 Reel 5 is configured as follows: Feed Spacing (mm): 4.0 Part X Offset (mm): 0.23 Part Y Offset (mm): 0 Part Height (mm): 0 Extra Rotation (degrees, positive is counter-clockwise): 0 Comment: 1206 Parts: R3 Configure Reel 1) Autoset parameters 2) Feed Spacing 3) Part X Offset 4) Part Y Offset 5) Height 6) Rotation 7) Comment 8) Unassign a Part 9) Back Which parameter would you like to set? 9 Reel 1 is configured as follows: Feed Spacing (mm): 4.0 Part X Offset (mm): 0.23 Part Y Offset (mm): 0 Part Height (mm): 0 Extra Rotation (degrees, positive is counter-clockwise): 0 Comment: 1206 Parts: R1 Reel 2 is configured as follows: Feed Spacing (mm): 4.0 Part X Offset (mm): 0.05 Part Y Offset (mm): 0 Part Height (mm): 0 Extra Rotation (degrees, positive is counter-clockwise): 0 Comment: 0805 Parts: R2 Reel 3 is configured as follows: Feed Spacing (mm): 4.0 Part X Offset (mm): 0.23 Part Y Offset (mm): 0 Part Height (mm): 0 Extra Rotation (degrees, positive is counter-clockwise): 0 Comment: 1206 Parts: D1 Reel 5 is configured as follows: Feed Spacing (mm): 4.0 Part X Offset (mm): 0.23 Part Y Offset (mm): 0 Part Height (mm): 0 Extra Rotation (degrees, positive is counter-clockwise): 0 Comment: 1206 Parts: R3 Which reel would you like to configure? [1, 2, 3, 5, (f)inished] f PNP CSV Manipulation: Reels: Reel 1 Reel 2 Reel 3 Reel 5 Choose an option: 1) Configure Reels 2) Save to file ? 2 (INFO): Generating instructions. (INFO): Adding offset instruction. (INFO): Setting stack offset for Reel 1 (INFO): Setting feed spacing for Reel 1 (INFO): Setting stack offset for Reel 2 (INFO): Setting feed spacing for Reel 2 (INFO): Setting stack offset for Reel 3 (INFO): Setting feed spacing for Reel 3 (INFO): Setting stack offset for Reel 5 (INFO): Setting feed spacing for Reel 5 (INFO): Collecting all parts. (INFO): Processing Part R1 (INFO): Processing Part R2 (INFO): Processing Part D1 (INFO): Processing Part R3 65535,0,0,0,, 65535,1,1,0.23,0,1206 65535,2,1,4, 65535,1,2,0.05,0,0805 65535,2,2,4, 65535,1,3,0.23,0,1206 65535,2,3,4, 65535,1,5,0.23,0,1206 65535,2,5,4, 1,1,1,141.73,-64.52,-90,0,0,, 2,1,2,156.59,-77.98,-90,0,0,, 3,1,3,135.38,-64.52,0,0,0,, 4,1,5,144.78,-64.52,90,0,0,,
Roadmap and TODOs
- KiCad integration as a graphical plugin
- Python 3 support.
- Increase test coverage
- Test on Windows
- Package Windows executable
- Write Windows documentation
- It might be better if you could get actual reel object for a part, rather than a reel index.
- Be more consistent with reel/reel_number/stack.
- Supporting setting nozzle (head) per part/reel
- Let folks set output filename in Save to File menu
- Document the describe script.
- Add more package types for autoset.
- Create an autoset config file so they’re not coded in the script.
Please let us know if there’s something on this list, or not on this list, that you’d like to see.
Developing
First, you need the source code. You already have it if you’re reading this.
You probably want to make a virtual environment. I like to do this in parallel with the package directory, next to the README. (You only need to do this once.)
virtualenv venv
Then, you’ll need to activate the virtualenv.
source venv/bin/activate
You should see (venv) at the beginning of your bash prompt. (To eventually exit this virtualenv, type “deactivate” at the bash prompt.).
Next, you need to install the package. How you do this slightly depends on if you are installing for development or not.
If you want to be able to easily develop on the package *in situ*, then install the package with:
pip install -e $PATH_TO_DIRECTORY_CONTAINING_SETUP.PY
This basically runs “setup.py develop”, which sets up some symlinks so your package stays where it is, but is symlinked into your PYTHONPATH. This works in and out of a virtualenv. The cool part about this is that you can edit your files keep working with your source control, and yet it still ends up on your PYTHONPATH so you don’t have to be in a certain directory to be able to import properly.
To install the test dependencies and run the tests, run
python setup.py test
Changelog
- v0.1:
- Initial release.
- This release was developed primarily while listening to the Diablo 2 soundtrack.
Acknowledgements
This tool was developed starting with the Dangerous Prototypes Wiki page, the public documentation from Neoden, and testing on our own TM-240A.
Is the video of the talk you gave available online?
I don’t think they officially recorded any of the presentations, and I don’t remember seeing anyone recording from the audience, but you never know, maybe someone recorded us on google glass. The slides are pretty close to what we said during the talk (and are posted above) but let us know if you have any questions, we’re happy to help.
Funny, I did the same thing about a year ago, but wrote a perl script to suck in the BOM, reel definition file, and BRD file. If you are you need some sleep I’d be happy to share. However, I’m way too lazy to document.
I just bought a NeoDen TM240A and now have a working password. I have been using KiCAD for over a year now and have designed about 3 boards (with many mods) using this tool suite. I am also a veteran C programmer and would like to convert your Python Code to C to run on Microsoft Windows. Your article states “First, you need the source code. You already have it if you’re reading this”. I am reading the article which I found using a Google search but I don’t see any source code. I guess the search bypassed the normal website hypertext link sequence so I don’t think I ever saw the source code. I will try to find it but in case I can’t, would you please send me a link. Thanks.
HI Paul, sorry for the confusion. That quote is from the readme file, which is included in this blog post.
The package containing all the source code is located here: http://www.wayneandlayne.com/files/tm2x0-0.1.zip
You can install it directly with easy_install or pip using that URL.
Hi Dear All,
This is Haimi from Neoden.
We are developer and manufacturer of TM240&TM220A(desktop pick and place machine).
We have provided more than 3000 sets of this pnp machine to over 110 counties for more than 3 years.We can offer competitive price,efficient delivery time,fast and professional after-sale service for life time.
We have three different models to meet different customer’s need and budget,all desktop type,do not need big space,and very easy to operate,no need professional engineer.
If any question,pls feel free to contact us.
skype:haimi2008
e-mail:haimi@neodentech.com
Wish all the best with you!
Hi All.
I think it’s Neoden (the TM2X0 manufacturer) task to provide converter tools.
Sure, all freelancer can make more tools but Neoden has this as first task before saying we have sell out 3000 machines.
Regards.
Hello All,
Thank you for your support on NeoDen Tech’s machines.
Hope our machine help you a lot in your daily work.
If there are any questions for our machines,you can feel free contact us:
Skype:tonny-neoden
Hi All,
Thank you for your support on NeoDen Tech’s machines.
Hope our machine help you a lot in your daily work.
If need any technical support,pls feel free contact us:
Skype:tonny-neoden
Hello! Neoden is currently distributing all of the equipment directly from US, offering full support directly from US. Feel free to drop us a line for any inquiries at: info[at]neodenusa.com